Vision Example Explained
Run the following command in Cloud Shell to confirm that you are authenticated:
gcloud auth list
Lists accounts whose credentials have been obtained using gcloud init , gcloud auth login and gcloud auth activate-service-account , and shows which account is active. The active account is
used by gcloud and other Cloud SDK tools to access Google Cloud Platform.
gcloud config list project
gcloud config list lists all properties of the active configuration. These include the account used to authorize access to the Cloud Platform,
the current Cloud Platform project, and the default Compute Engine region and zone, if set. See gcloud topic configurations for more about configurations.
gcloud config set project
gcloud config set - sets the specified property in your active configuration only. A property governs the behavior
of a specific aspect of Cloud SDK such as the service account to use or the verbosity
level of logs. To set the property across all configurations, use the --installation flag.
Python3
Python 3.7.3 (default, Jul 25 2020, 13:03:44)
[GCC 8.3.0] on linux
Type "help", "copyright", "credits" or "license" for more information.
>>>
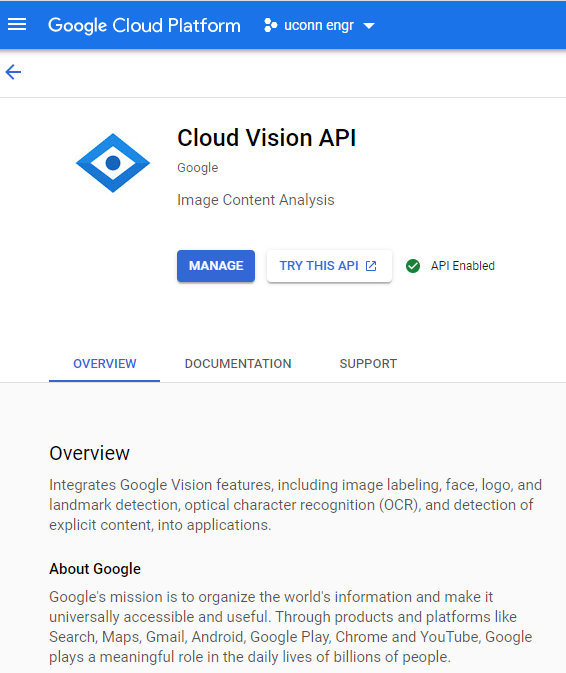
Enable the Cloud Functions, Cloud Translation, and Cloud Vision APIs.

Search for API’s
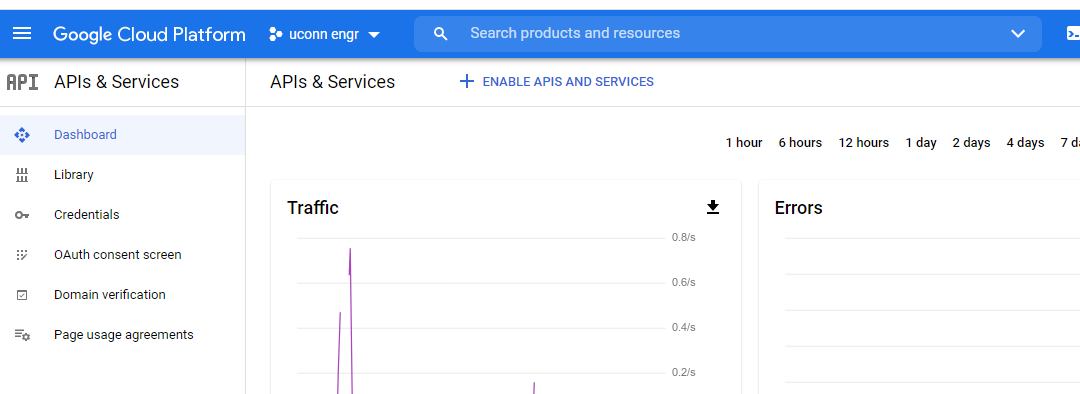
Enable Cloud Vision API
Authorize API requests (service acct authorization)
In order to make requests to the APIs, your application needs to have the proper
authorization. Authentication, a similar word, describes login credentials—you authenticate yourself when logging
into your Google account with a login & password. Once authenticated, the next step is
whether you are—or rather, your code, is—authorized to access data, such as blob files on Cloud Storage or a user's personal files on
Google Drive.
Google APIs support several types of authorization, but the one most common for
GCP API users is service account authorization since applications like the one in this codelab runs in the cloud as a "robot user."
While the Vision API supports API key authorization as well, it's strongly recommended
that users employ a more secure form of authorization.
A service account is an account that belongs to your project or application
(rather than a user) that is used by the client library to make Vision API requests. Like a user account, a service account is represented by an email address.
You can create service account credentials from either the command line
(via gcloud) or in the Cloud Console. Let's take a look at both below.
From the Cloud Console
To get OAuth2 credentials for user authorization, go back to the API manager
(shortcut link: console.developers.google.com) and select the "Credentials" tab on the left-nav:
Go to API’s

Next Credentials
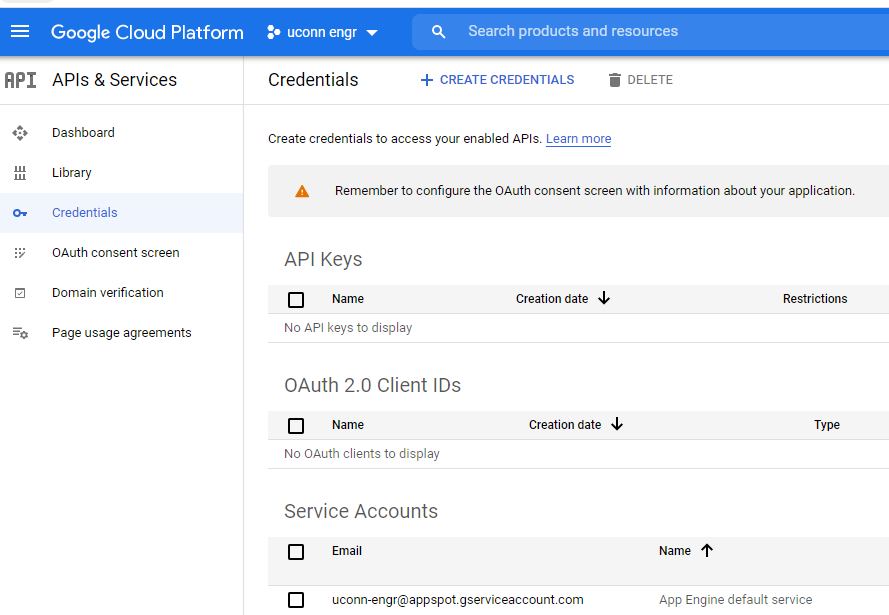
From the Credentials page, click on the "+ Create Credentials" button at the top,
which then gives you a pulldown dialog where you'd choose "Service account:"

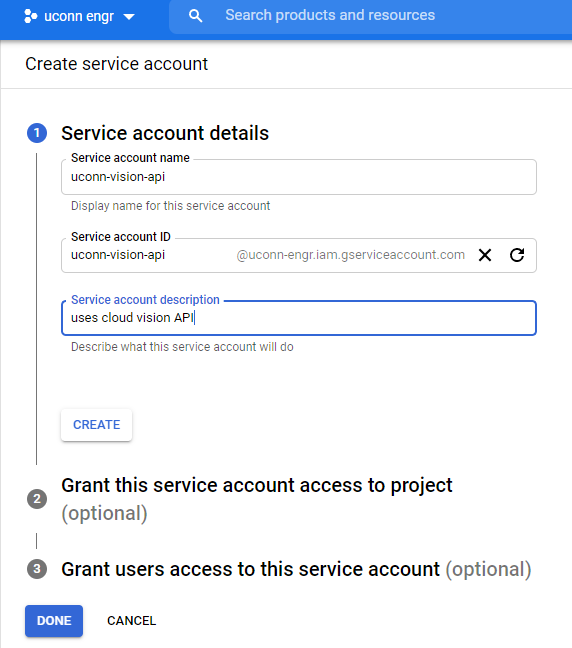
On the "Create service account" screen (similar to the below), you must enter a Service
account name (choose something short but explanatory like "svc acct vision" or the one
we used with gcloud above, "my vision sa". A Service account ID is also required, and the form will create a
valid ID string similar to the name you chose. The Service account description field is
optional, but you can specify something like, "Service account for Vision API demo".
Click the "Create" button when complete.
The next step is to grant service account access to this project. Having a service account
is great, but if it doesn't have permissions to access project resources,
it's kind-of useless... it's like creating a new user who doesn't have any access.
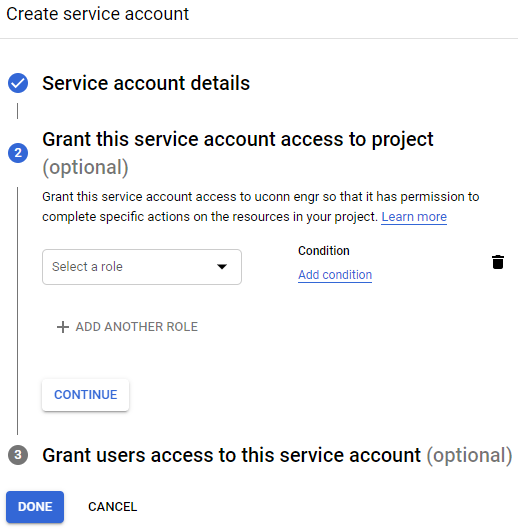
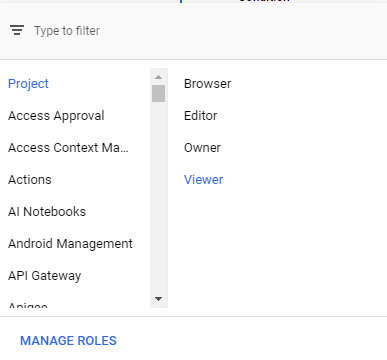
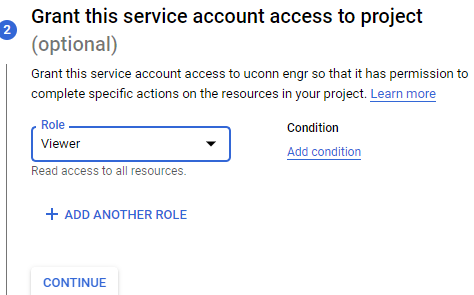
Here, click on the "Select a role" pulldown menu. You'll see a variety of options
(see below), some more granular than others. For this codelab,
choose Project → Viewer. Then click Continue.
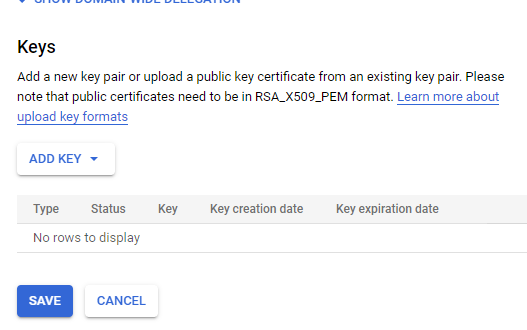
On this 3rd screen (see below), we will skip granting specific users access to this service
account, but we do need to make a private key our application script can use to access
the Vision API with. To that end, click the "+ Create Key" button.
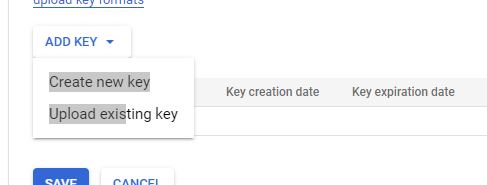
Next click on the pencil to edit the service account in order to add key

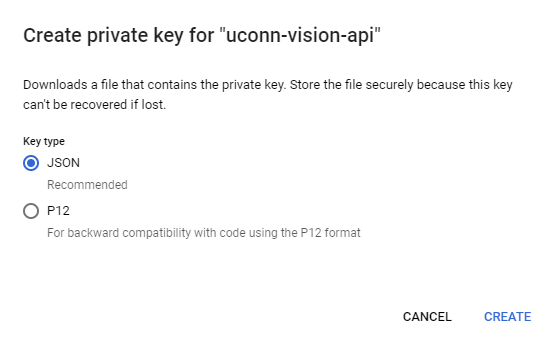
Creating a key is straightforward on the next screen. Take the default of a JSON key
structure. (P12 is only used for backwards-compatibility, so it is not recommended for
new projects.) Click the "Create" button and save the private key file when prompted.
The default filename will be long and possibly confusing,
i.e., PROJECT_ID-HASH.json, so we recommend renaming it to something more digestible such as key.json or svc_acct.json.

Click the "Close" button to complete this task from the console.
The environment variable should be set to the full path of the credentials JSON file you
saved. It's not necessary to do so, but if you don't, you can only use that key file from
the current working directory.
You can read more about authenticating the Google Cloud Vision API, including the other forms of authorization, i.e., API key, user authorization OAuth2
client ID, etc.
Next got to your cloud shell

Uploading and downloading files
You can upload and download files easily using Cloud Shell. To do so, you can
choose any of these methods of transferring files to best suit your needs:
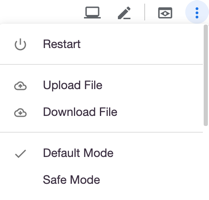
From the Cloud Shell three-dotted More menu, select either Upload file or
Download file to move your files to and from Cloud Shell.
Note: the created file must be named key.json in the $HOME directory for the code to
work.
In your local PC down directory update the key to your cloud shell $HOME directory.
Note: $HOME is the root directory of your cloud shell or the directory where you are
initially positioned in
click 3 dots
Then click upload file

User windows browser to find the key file that was created
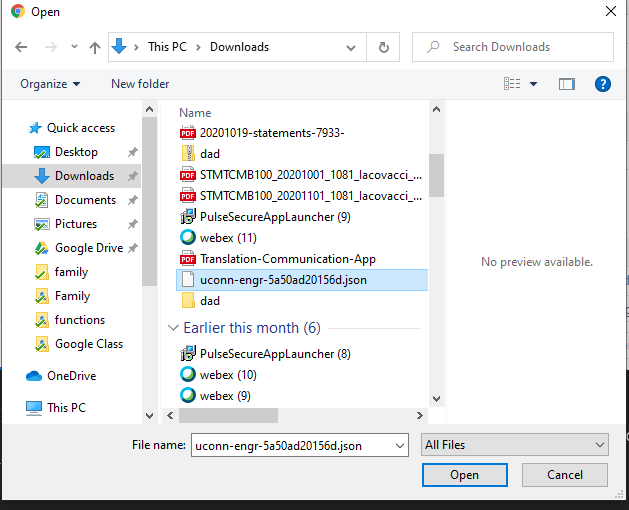
Select open and file is now in your home directory.
From your $ prompt list the file that you uploaded.
Note: the downloaded file is prefixed by the project name

Using your mouse select the file name and hit Ctrl-C to copy the name
Now type cp (paste file name) key.json
(uconn-engr)$ cp uconn-engr-5a50ad20156d.json key.json
Summary
One last step whether you created your service account from the command-line or in
the Cloud console: direct your cloud project to use this as the default service account
private key to use for your application by assigning this file to the
GOOGLE_APPLICATION_CREDENTIALS environment variable:
export GOOGLE_APPLICATION_CREDENTIALS=~/key.json
(uconn-engr)$ export GOOGLE_APPLICATION_CREDENTIALS=~/key.json
6. Install the Cloud Vision client library for Python
We're going to use the Vision API client library for Python which should already be
installed in your Cloud Shell environment. Verify it's installed with with pip or pip3:
$ pip3 freeze | grep google-cloud-vision
google-cloud-vision==1.0.0
If you're using a local development environment or using a new virtual environment
you just created, install/update the client library (including pip itself if necessary) with this command:
$ pip3 install -U pip google-cloud-vision
...
Successfully installed google-cloud-vision-1.0.0
Confirm the client library can be imported without issue like the below,
and then you're ready to use the Vision API from real code!
$ python3 -c "import google.cloud.vision"
$
7. Perform Label Detection
One of the Vision API's basic features is to identify objects or entities in an image,
known as label annotation. Label detection identifies general objects, locations, activities, animal species, products, and more. The Vision API takes an input image and returns the most likely labels which apply to that image. It returns the top-matching labels along with a confidence score of a match to the image.
In this example, you will perform label detection on an image of a street scene in
Shanghai. To do this, copy the following Python code into your IPython session
(or drop it into a local file such as label_detect.py and run it normally):
Make a directory for your files
(uconn-engr)$ mkdir vision-api
Open Editor
Highlight the directory you just created

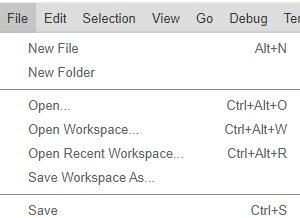
Select File then
New File
Name file label_detect.py

Copy and paste code below
===========================================================
from __future__ import print_function
from google.cloud import vision
image_uri = 'gs://cloud-samples-data/vision/using_curl/shanghai.jpeg'
client = vision.ImageAnnotatorClient()
image = vision.types.Image()
image.source.image_uri = image_uri
response = client.label_detection(image=image)
print('Labels (and confidence score):')
print('=' * 30)
for label in response.label_annotations:
print(label.description, '(%.2f%%)' % (label.score*100.))
==========================================================

Save the file
Open terminal
(uconn-engr)$ cd vision-api]
Run the program
john_iacovacci1@cloudshell:~/vision-api (uconn-engr)$ python label_detect.py
john_iacovacci1@cloudshell:~/vision-api (uconn-engr)$ python label_detect.py
**********************************************************************
Python 2 is deprecated. Upgrade to Python 3 as soon as possible.
See https://cloud.google.com/python/docs/python2-sunset
To suppress this warning, create an empty ~/.cloudshell/no-python-warning file.
The command will automatically proceed in seconds or on any key.
***********************************************************************
Labels (and confidence score):
==============================
People (95.05%)
Street (89.12%)
Mode of transport (89.09%)
Transport (85.13%)
Vehicle (84.69%)
Snapshot (84.11%)
Urban area (80.29%)
Infrastructure (73.14%)
Road (72.74%)
Pedestrian (68.90%)
john_iacovacci1@cloudshell:~/vision-api (uconn-engr)$
You should see the following output:
Labels (and confidence score):
==============================
People (95.05%)
Street (89.12%)
Mode of transport (89.09%)
Transport (85.13%)
Vehicle (84.69%)
Snapshot (84.11%)
Urban area (80.29%)
Infrastructure (73.14%)
Road (72.74%)
Pedestrian (68.90%)
Note: If this Python code doesn't work for you (you get an authentication error), verify
the instructions you performed during Authenticate API requests step.
Using the following command to verify the value of
GOOGLE_APPLICATION_CREDENTIALS environment variable: echo $GOOGLE_APPLICATION_CREDENTIALS
It should output the expanded path to your file key.json (or whatever name you chose to save it as). If it does, next check that a service
account was created and is located at ~/key.json by using: cat ~/key.json You should see something similar to:
{
"type": "service_account",
"project_id": "PROJECT_ID",
"private_key_id": "ff31939192529e07f42e4535fb20bb029def1276",
"Private_key":...
If you don't, revisit the Authenticate API requests step above.
Summary
In this step, you were able to perform label detection on an image of a street scene in
China and display the most likely labels associated with that image. Read more about
8. Perform Text Detection
Text detection performs Optical Character Recognition (OCR). It detects and extracts
text within an image with support for a broad range of languages. It also features
automatic language identification.
In this example, you will perform text detection on an image of an Otter Crossing. Copy the following snippet into your IPython session (or save locally as text_dectect.py):
===========================================================
from __future__ import print_function
from google.cloud import vision
image_uri = 'gs://cloud-vision-codelab/otter_crossing.jpg'
client = vision.ImageAnnotatorClient()
image = vision.types.Image()
image.source.image_uri = image_uri
response = client.text_detection(image=image)
for text in response.text_annotations:
print('=' * 30)
print(text.description)
vertices = ['(%s,%s)' % (v.x, v.y) for v in text.bounding_poly.vertices]
print('bounds:', ",".join(vertices))
==================================================================
john_iacovacci1@cloudshell:~/vision-api (uconn-engr)$ python label_detect.py
The command will automatically proceed in seconds or on any key.
********************************************************************************
Perform Landmark Detection
Landmark detection detects popular natural and man-made structures within an image.
In this example, you will perform landmark detection on an image of the Eiffel Tower.
To perform landmark detection, copy the following Python code into your
IPython session (or save locally as landmark_dectect.py).
from __future__ import print_function
from google.cloud import vision
image_uri = 'gs://cloud-vision-codelab/eiffel_tower.jpg'
client = vision.ImageAnnotatorClient()
image = vision.types.Image()
image.source.image_uri = image_uri
response = client.landmark_detection(image=image)
for landmark in response.landmark_annotations:
print('=' * 30)
print(landmark)
Perform Emotional Face Detection
Facial features detection detects multiple faces within an image along with the
associated key facial attributes such as emotional state or wearing headwear.
In this example, you will detect the likelihood of emotional state from four different
emotional likelihoods including: joy, anger, sorrow, and surprise.
To perform emotional face detection, copy the following Python code into your
IPython session (or save locally as face_dectect.py):
from __future__ import print_function
from google.cloud import vision
uri_base = 'gs://cloud-vision-codelab'
pics = ('face_surprise.jpg', 'face_no_surprise.png')
client = vision.ImageAnnotatorClient()
image = vision.types.Image()
for pic in pics:
image.source.image_uri = '%s/%s' % (uri_base, pic)
response = client.face_detection(image=image)
print('=' * 30)
print('File:', pic)
for face in response.face_annotations:
likelihood = vision.enums.Likelihood(face.surprise_likelihood)
vertices = ['(%s,%s)' % (v.x, v.y) for v in face.bounding_poly.vertices]
print('Face surprised:', likelihood.name)
print('Face bounds:', ",".join(vertices))
==============================
File: face_surprise.jpg
Face surprised: LIKELY
Face bounds: (93,425),(520,425),(520,922),(93,922)
==============================
File: face_no_surprise.png
Face surprised: VERY_UNLIKELY
Face bounds: (120,0),(334,0),(334,198),(120,198)
1. Conclusion
Congratulations... you learned how to use the Vision API with Python to perform several
image detection features! Also check out the code samples in this codelab's open source
repo—while the code in this tutorial works for both 2.x (2.6+) and 3.x, the code in the
repo requires 3.6+.
Clean up
You're allowed to perform a fixed amount of (label, text/OCR, landmark, etc.) detection
calls per month for free. Since you only incur charges each time you call the Vision API,
there's no need to shut anything down nor must you disable/delete your project.
More information on billing for the Vision API can be found on its pricing page.
Build 3 python program that will use Google Vision API to scan 3 separate images
Note: need to use your own images and store them on your Google Storage Bucket
image_uri = 'gs://cloud-samples-data/vision/using_curl/shanghai.jpeg'
image_uri = 'gs://dollarsforstuff/shanghai.jpg'
Send me the output from each run of the function in an email
No comments:
Post a Comment