Text Analysis NLP
1. Overview
In this codelab, you will focus on using the Natural Language API with Python. You will learn how to perform sentiment analysis, entity analysis, syntax analysis, and content classification.
What you'll learn
How to use Cloud Shell
How to enable the Natural Language API
How to authenticate API requests
How to install the client library for Python
How to perform sentiment analysis
How to perform entity analysis
How to perform syntax analysis
How to perform content classification
What you'll need
2. Setup and requirements
Self-paced environment setup
Sign in to Cloud Console and create a new project or reuse an existing one. (If you don't already have a Gmail or G Suite account, you must create one.)
Note: You can easily access Cloud Console by memorizing its URL, which is console.cloud.google.com.
Remember the project ID, a unique name across all Google Cloud projects (the name above has already been taken and will not work for you, sorry!). It will be referred to later in this codelab as PROJECT_ID.
Note: If you're using a Gmail account, you can leave the default location set to No organization. If you're using a G Suite account, then choose a location that makes sense for your organization.
Next, you'll need to enable billing in Cloud Console in order to use Google Cloud resources.
Running through this codelab shouldn't cost much, if anything at all. Be sure to to follow any instructions in the "Cleaning up" section which advises you how to shut down resources so you don't incur billing beyond this tutorial. New users of Google Cloud are eligible for the $300USD Free Trial program.
Start Cloud Shell
While Google Cloud can be operated remotely from your laptop, in this codelab you will be using Cloud Shell, a command line environment running in the Cloud.
Activate Cloud Shell
From the Cloud Console, click Activate Cloud Shell .


If you've never started Cloud Shell before, you're presented with an intermediate screen (below the fold) describing what it is. If that's the case, click Continue (and you won't ever see it again). Here's what that one-time screen looks like:
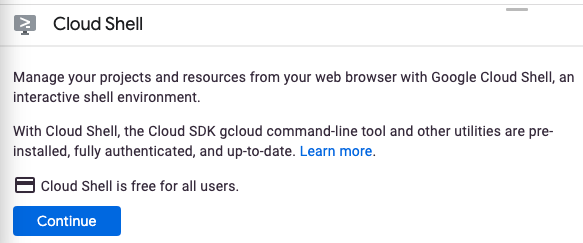
It should only take a few moments to provision and connect to Cloud Shell.
3. Enable the API
Before you can begin using the Natural Language API, you must enable the API. Using Cloud Shell, you can enable the API with the following command:
gcloud services enable language.googleapis.com
Note: In case of error, go back to the previous step and check your setup.
4. Authenticate API requests
In order to make requests to the Natural Language API, you need to use a Service Account. A Service Account belongs to your project and it is used by the Python client library to make Natural Language API requests. Like any other user account, a service account is represented by an email address. In this section, you will use the Cloud SDK to create a service account and then create credentials you will need to authenticate as the service account.
First, set a PROJECT_ID environment variable:
export PROJECT_ID=$(gcloud config get-value core/project)
Next, create a new service account to access the Natural Language API by using:
gcloud iam service-accounts create my-nl-sa \
--display-name "my nl service account"
Next, create credentials that your Python code will use to login as your new service account. Create and save these credentials as a ~/key.json JSON file by using the following command:
gcloud iam service-accounts keys create ~/key.json \
--iam-account my-nl-sa@${PROJECT_ID}.iam.gserviceaccount.com
Finally, set the GOOGLE_APPLICATION_CREDENTIALS environment variable, which is used by the Natural Language API Python library, covered in the next step, to find your credentials. The environment variable should be set to the full path of the credentials JSON file you created, by using:
export GOOGLE_APPLICATION_CREDENTIALS=~/key.json
Note: You can read more about authenticating to a Google Cloud API.
5. Install the client library
You're going to use the Google Cloud Python client library, which should already be installed in your Cloud Shell environment. You can read more about Google Cloud Python services here.
Check that the client library is already installed:
pip3 freeze | grep google-cloud-language
You should see something similar to:
google-cloud-language==2.0.0
Note: If you're setting up your own Python development environment, you can follow these guidelines. You can then install (or update) the Natural Language API client library with pip3:
pip3 install --user --upgrade google-cloud-language
...
Successfully installed google-cloud-language-2.0.0
Now, you're ready to use the Natural Language API!
6. Start Interactive Python
In this tutorial, you'll use an interactive Python interpreter called IPython, which is preinstalled in Cloud Shell. Start a session by running ipython in Cloud Shell:
ipython
You should see something like this:
Python 3.7.3 (default, Jul 25 2020, 13:03:44)
Type 'copyright', 'credits' or 'license' for more information
IPython 7.19.0 -- An enhanced Interactive Python. Type '?' for help.
In [1]:
Note: If needed, you can quit your IPython session with the exit command.
7. Sentiment analysis
In this section, you will perform Sentiment Analysis on a string and find out the Score and Magnitude using the Natural Language API.
The Score of the sentiment ranges between -1.0 (negative) and 1.0 (positive) and corresponds to the overall sentiment from the given information.
The Magnitude of the sentiment ranges from 0.0 to +infinity and indicates the overall strength of sentiment from the given information. The more information that is provided the higher the magnitude.
Copy the following code into your IPython session:
from google.cloud import language
def analyze_text_sentiment(text):
client = language.LanguageServiceClient()
document = language.Document(content=text, type_=language.Document.Type.PLAIN_TEXT)
response = client.analyze_sentiment(document=document)
sentiment = response.document_sentiment
results = dict(
text=text,
score=f"{sentiment.score:.1%}",
magnitude=f"{sentiment.magnitude:.1%}",
)
for k, v in results.items():
print(f"{k:10}: {v}")
Call the function:
text = "Guido van Rossum is great!"
analyze_text_sentiment(text)
You should see the following output:
text : Guido van Rossum is great!
score : 90.0%
magnitude : 90.0%
Take a moment to test your own sentences.
Summary
In this step, you were able to perform Sentiment Analysis on a string of text and printed out its score and magnitude. Read more about Sentiment Analysis.
8. Entity analysis
Entity Analysis inspects the given information for entities by searching for proper nouns such as public figures, landmarks, etc., and returns information about those entities.
Copy the following code into your IPython session:
from google.cloud import language
def analyze_text_entities(text):
client = language.LanguageServiceClient()
document = language.Document(content=text, type_=language.Document.Type.PLAIN_TEXT)
response = client.analyze_entities(document=document)
for entity in response.entities:
print("=" * 80)
results = dict(
name=entity.name,
type=entity.type_.name,
salience=f"{entity.salience:.1%}",
wikipedia_url=entity.metadata.get("wikipedia_url", "-"),
mid=entity.metadata.get("mid", "-"),
)
for k, v in results.items():
print(f"{k:15}: {v}")
Call the function:
text = "Guido van Rossum is great, and so is Python!"
analyze_text_entities(text)
You should see the following output:
================================================================================
name : Guido van Rossum
type : PERSON
salience : 65.8%
wikipedia_url : https://en.wikipedia.org/wiki/Guido_van_Rossum
mid : /m/01h05c
================================================================================
name : Python
type : ORGANIZATION
salience : 34.2%
wikipedia_url : https://en.wikipedia.org/wiki/Python_(programming_language)
mid : /m/05z1_
Take a moment to test your own sentences mentioning other entities.
Summary
In this step, you were able to perform Entity Analysis on a string of text and printed out its entities. Read more about Entity Analysis.
9. Syntax analysis
Syntactic Analysis extracts linguistic information, breaking up the given text into a series of sentences and tokens (generally, word boundaries), providing further analysis on those tokens.
This example will print out the number of sentences, tokens, and provide the part of speech for each token.
Copy the following code into your IPython session:
from google.cloud import language
def analyze_text_syntax(text):
client = language.LanguageServiceClient()
document = language.Document(content=text, type_=language.Document.Type.PLAIN_TEXT)
response = client.analyze_syntax(document=document)
fmts = "{:10}: {}"
print(fmts.format("sentences", len(response.sentences)))
print(fmts.format("tokens", len(response.tokens)))
for token in response.tokens:
print(fmts.format(token.part_of_speech.tag.name, token.text.content))
Call the function:
text = "Guido van Rossum is great!"
analyze_text_syntax(text)
You should see the following output:
sentences : 1
tokens : 6
NOUN : Guido
NOUN : van
NOUN : Rossum
VERB : is
ADJ : great
PUNCT : !
Take a moment to test your own sentences with other syntactic structures.
Here is a visual interpretation showing the complete syntactic analysis:
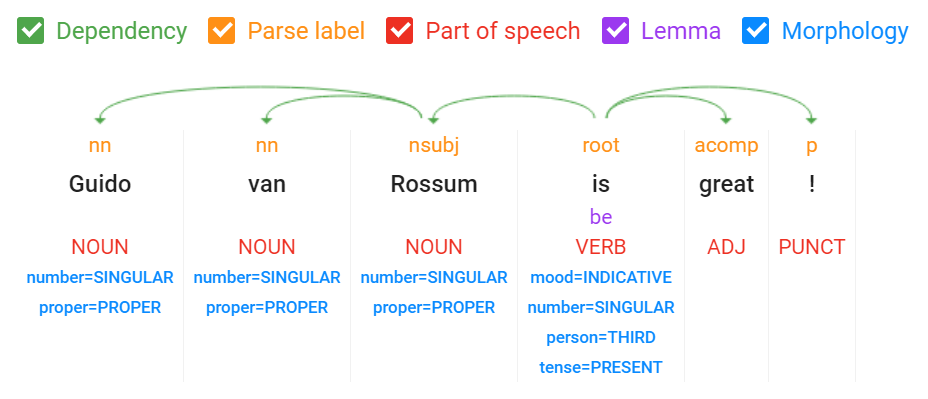
Note: You can create your own parse trees with the Natural Language demo available here: https://cloud.google.com/natural-language/.
Summary
In this step, you were able to perform Syntax Analysis on a simple string of text and printed out the number of sentences, number of tokens, and linguistic information for each token. Read more about Syntax Analysis.
10. Content classification
Content Classification analyzes a document and return a list of content categories that apply to the text found in the document.
This example will print out the categories that apply to a description of the Python language.
Copy the following code into your IPython session:
from google.cloud import language
def classify_text(text):
client = language.LanguageServiceClient()
document = language.Document(content=text, type_=language.Document.Type.PLAIN_TEXT)
response = client.classify_text(document=document)
for category in response.categories:
print("=" * 80)
print(f"category : {category.name}")
print(f"confidence: {category.confidence:.0%}")
Call the function:
text = (
"Python is an interpreted, high-level, general-purpose programming language. "
"Created by Guido van Rossum and first released in 1991, "
"Python's design philosophy emphasizes code readability "
"with its notable use of significant whitespace."
)
classify_text(text)
You should see the following output:
===========================================================
category : /Computers & Electronics/Programming
confidence: 99%
===========================================================
category : /Science/Computer Science
confidence: 99%
Take a moment to test your own sentences relating to other categories. A complete list of content categories can be found here.
Note: You must supply a text block (document) with at least twenty tokens (words).
Summary
In this step, you were able to perform Content Classification on a string of text and printed out the related categories. Read more about Content Classification.
11. Congratulations!
You learned how to use the Natural Language API using Python!
Clean up
To avoid incurring charges to your Google Cloud account for the resources used in this tutorial:
In the Cloud Console, go to the Manage resources page.
In the project list, select your project then click Delete.
In the dialog, type the project ID and then click Shut down to delete the project.
Learn more
Test the demo in your browser: https://cloud.google.com/ml-onramp/natural-language
Natural Language documentation: https://cloud.google.com/natural-language/docs/
Python on Google Cloud: https://cloud.google.com/python/
Cloud Client Libraries for Python: https://googlecloudplatform.github.io/google-cloud-python/
No comments:
Post a Comment